This guide outlines the application technique for a planked (standard) Chapter 8 kit, in which all red reflective and fluorescent yellow chevrons are provided as individual pieces.
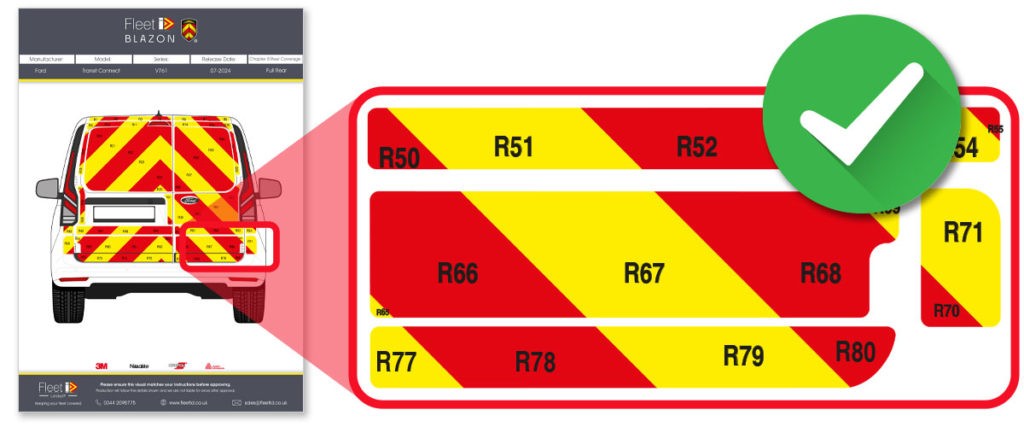
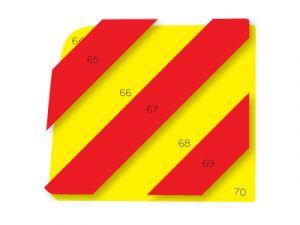
The first thing to do – before applying the kit to the vehicle – is to check that all required panels are present and correct. Simply check off each numbered panel against the printed, numbered plan that came with the kit.
In the unlikely event of any incorrect or missing panels, it is much easier for us to send these out to you straight away. Mistakes cannot be refunded once the application of the Chapter 8 kit has begun, so it is important to let us know of any missing or incorrect panels before starting to apply the kit.
The temperature of the vehicle is very important for the successful application of chevron markings. By parking the vehicle indoors for at least 24 hours prior to application, it will allow the surface of the vehicle to warm to the correct temperature and to protect it from dirt after being cleaned.
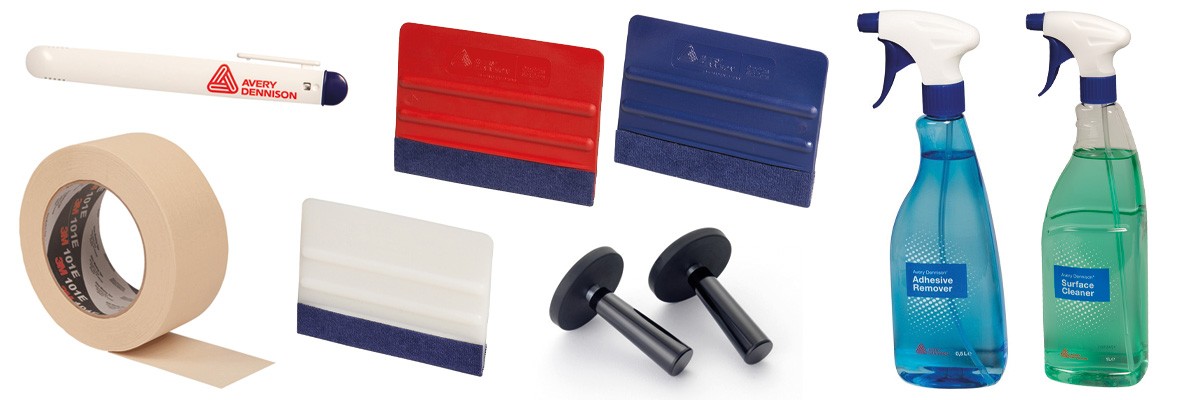
| Washing Equipment Wash the vehicle with soapy water and dry thoroughly, making sure it is completely dry. |
Surface Preparation Fluid Use the fluid with a clean lint free cloth to ensure the surface is grease free. |
Masking tape/Magnets Masking tape and magnets will help to position the panels on the vehicle before fitting begins. |
| Plastic Applicators Apply firm strokes to the vinyl surface, ensuring sufficient bond to the vehicle and removing any air pockets. |
Snap Off Knives Used to remove any air bubbles and excess backing paper before applying to the vehicle. |
Infrared Thermometer The vehicle surface should be above 16°C. This can be checked with an infrared thermometer. |
It is important that both the vehicle surface temperature and the temperature of the material being fitted is correct – we recommend around 16°C, but please refer to the material manufacturer’s guidelines for optimal fitting temperatures.
You can use a temperature gun to measure these temperatures. If heating is necessary for either element, apply a suitable heat source carefully – avoid distorting or melting the materials while doing so.
For optimal results, ensure the surface is clean and free of wax, grease, polish, silicone, rust, fingerprints, and any flaking or peeling paint.
Remove any vehicle manufacturer and model badges from the vehicle – do not trim the panels to fit around them. This will ensure the best results from the material and will not compromise the material manufacturers warranty. Replace badges when fitting is complete.
For flooded separate, flooded applied, and magnetic kits, use the same preparation and application techniques described in the below steps, with the following modifications…
 |
 |
 |
| Flooded Separate First apply the ‘base’ yellow panels and then apply the reflective red chevrons over the top. |
Flooded Applied Apply each section of the kit (which include the red chevrons already applied to the yellow sections). |
Magnetic Apply the kit as and when required, ensuring that the surface is completely clean prior to application and removing the kit when not required. |
We know there’s quite a lot of information on this page! That’s why we’ve created a pdf file of the application and care instructions for you to print off and keep handy when you’re applying your next Chapter 8 kit.
Use masking tape to position all parts of the kit on the vehicle. Make sure the chevrons are properly aligned across the entire area and confirm that all components are present and correct. Each panel comes pre-hinged and ready for installation.
Begin at the centre of the vehicle and work outward toward the edges. Hinge back the first panel and carefully remove the backing paper. Hold the film taut and away from the vehicle surface, keeping it ready for smooth application.
Using a plastic applicator, apply the film to the vehicle with firm, overlapping horizontal strokes to ensure strong adhesion. Keep the graphic taut to prevent air bubbles and creases. Avoid letting the film touch the vehicle surface before it is applied with the applicator.
Repeat this process for each individual panel provided for the vehicle, continuing to work from the center outward. Remove the masking tape from each hinged panel as you go.
After applying all panels, check that the material is fully adhered, paying close attention to the edges. Use a snap-off knife to carefully remove any air bubbles, then squeegee the entire graphic again to ensure maximum adhesion across the entire area.
Apply door lozenges to a flat section along the edge of each open door on the vehicle. Once positioned, remove the backing paper and firmly squeegee the lozenge onto the surface of the internal door using horizontal strokes.
Wipe the applied material with a lint-free cloth to remove any dirt or particles that may have accumulated during installation.
Allow 24 hours for the kit to fully bond, then the vehicle is ready for the road!
The way you clean and maintain a Chapter 8 kit after application will have a big impact on the overall durability and effectiveness of the reflective and fluorescent materials used to make the markings. Incorrect care can also lead to warranties being invalidated, so it’s really important to ensure proper care is carried out.
 |
 |
CORRECT CAREUse a fan spray of water |
INCORRECT CAREDo not direct high pressure water at edges of sheeting |
The above instructions apply to planked, flooded separate, and flooded applied Chapter 8 kits. However, maintaining a magnetic kit requires a slightly different approach to ensure it stays clean and in good condition.
We hope you found this guide to the application and care of chevron kits from Fleet ID useful. If you have any questions about how to apply a Chapter 8 kit, or anything relating to rear chevron markings and vehicle safety markings, don’t hesitate to contact our team. Our sales, production and fitting specialists will be happy to help. Call on 0344 2098775 or email the team today.